The Migration Tool for Microsoft Dynamics AX 2009 supports the migration of data from competing business management solutions to Microsoft Dynamics AX 2009.
It is a .NET application with a client/server architecture and uses Microsoft SQL Server® 2005 Integration Services (SSIS) packages.
The tool can be download from Microsoft Partnersource. Click here to download.
Thursday, November 27, 2008
Wednesday, November 26, 2008
Service Pack 1 for Microsoft Dynamics AX 2009 has been released
Service Pack 1 for Microsoft Dynamics AX 2009 has been released.
Microsoft Dynamics AX 2009 Service Pack 1 (SP1) contains the updates that have been issued for Microsoft Dynamics AX 2009 and a number of enhancements and new features to improve the product’s functionality and user experience.
To know more about Microsoft Dynamics AX 2009 Service Pack 1 (SP1) click here (Microsoft Partnersource access is required).
Tuesday, November 25, 2008
How to write Queries in Microsoft Dynamics Ax
This article is for beginner level.
This article explains:
How to write a query in Microsoft Dynamics Ax
How to add a DataSource to a Microsoft Dynamics Ax query
How to add a range to a Microsoft Dynamics Ax query
How to use Sum clause to a Microsoft Dynamics Ax query
How to use GroupBy clause to a Microsoft Dynamics Ax query
Instead of write a select statement it's better write queries using query objects.
Prerequisites:
1. You should be familiar with Microsoft Dynamics Ax
2. You should be familiar with X++ language
Following is an example of a query.
Create a new job and test it.
I used a table called Table1 where EmplId(string), BalanceHours(real),TransDate(date) and few more fields are available. I want to write a query where record will be shorted by EmplId in ascending order, sum of BalanceHours to be calculated by EmplId, a range should be on TransDate.
The job is written below:
static void job1(Args _agrs)
{
Query q;
queryRun qr;
QueryBuildRange qbr;
QueryBuildDataSource qbd;
EmplTable emplTableLoc;
Table1 table1Local;
;
q = new Query();
qbd = q.addDataSource(tableNum(Table1));//Table1 is being added to the datasource
qbd.addSortField(fieldNum(Table1,EmplId),SortOrder::Ascending);//Records will be shorted by EmplId in Ascending order
qbd.addSelectionField(fieldNum(Table1,BalanceHours),SelectionField::Sum);//Sum of balance hours to be calculated.
qbd.orderMode(OrderMode::GroupBy);//Records will be groupby EmplId. If you don't do this then you will get the result of BalanceHours only.
qbr = qbd.addRange(fieldNum(Table1,TransDate));//For Date range. In a normal select statement we use where clause in place of this
qbr.value(SysQuery::range(systemdateget()-29,systemdateget()));//date range values
qr = new queryRun(q);//Assigning query to query run
while(qr.next())
{
table1Local = qr.get(tableNum(Table1));//Assigning the selected records to an instance of Table1 called table1Local
info(strfmt('Employee Id: %1 Balance Hours: %2',table1Local.EmplId,table1Local.BalanceHours));
}
}
After execution the job I got the result as shown below:

Integration between Microsoft Dynamics Ax and Microsoft Dynamics CRM
Hi guys,
If you are looking for an integration solution between Microsoft® DynamicsTM Ax and Microsoft® DynamicsTM CRM, there is cool tool for it. It's called 'Celenia CRM Connector' for Microsoft® DynamicsTM AX and NAV. The features and bevahors of this connection is great. Using this Celenia connector you can also connect you NAV application to your CRM application. To know more about it you can visit the link below.

Click here to visit website.
You can see a demo how to use celenia connector...
How to integrate CRM to Ax...
How to integrate CRM to NAV...
If you are looking for an integration solution between Microsoft® DynamicsTM Ax and Microsoft® DynamicsTM CRM, there is cool tool for it. It's called 'Celenia CRM Connector' for Microsoft® DynamicsTM AX and NAV. The features and bevahors of this connection is great. Using this Celenia connector you can also connect you NAV application to your CRM application. To know more about it you can visit the link below.
Click here to visit website.
You can see a demo how to use celenia connector...
How to integrate CRM to Ax...
How to integrate CRM to NAV...
Saturday, November 8, 2008
How to use DLL or external DLL within Microsoft® DynamicsTM Ax
Here no article is published but it refers to an other article where I mentioned how to use CLR Interop or DLL.
Click here to see the article.
Click here to see the article.
Monday, October 20, 2008
Microsoft® Dynamics™ Snap for Microsoft® Dynamics™ AX Sandbox
What is Microsoft® Dynamics™ Snap?
Microsoft® Dynamics™ Snap applications allow workers to access Microsoft® Dynamics™ data where and when they need it—while working in Microsoft® Office. It's one of the good features of Microsoft® Dynamics™ Ax.
Now Snap for Microsoft® Dynamics™ AX 2009 is available. To download the source code logon to click http://www.codeplex.com/axsnap.
The Business Data Lookup Snap-in enables an Information Worker to look for information in Microsoft Dynamics AX™ 2009 from within 2007 Microsoft® Office system applications. Using a task pane launched within Word, within Microsoft Excel® or within an email in Microsoft Outlook®, the Information Worker can
Provides powerful search capabilities that allow an information worker/user to search for information across Microsoft business systems including Microsoft Dynamics AX and SharePoint Server portals from within Microsoft Office Outlook as simply as searching email.
Business Data LookupAllows an information worker/user to search for and insert Microsoft Dynamics AX into a Microsoft Office Word document, Excel spreadsheet or Outlook email, all without ever having to leave the Microsoft Office interface. The document or spreadsheet that is created can also be attached to the Microsoft Dynamics record for later reference.
Custom Report GeneratorEnables an information worker/user to extract, view and analyze data residing in Microsoft Dynamics AX as neatly formatted reports within Microsoft Office Excel. Creating a new report or editing an existing one is easy since the reports are generated from meta-data that defines what data to show, where to surface it and what formatting to apply.
Timesheet ManagementAllows an information worker/user to use their Outlook Calendar entries to submit timesheets without having to log into Microsoft Dynamics AX directly.
Vacation ManagementEnables an information worker/user to use their Outlook Calendar to submit vacation requests without having to log into Microsoft Dynamics AX directly.
Expense ManagementAllows an information worker/user to easily create, submit and approve or reject expense reports in SharePoint, without having to log into Microsoft Dynamics AX directly.
Customer JournalEnables a salesperson to take an offline InfoPath record of all pertinent customer information to a sales meeting, access that information from their desktop, revise that information as needed, then synchronize their changes in the Microsoft Dynamics AX system once they are back online.
Microsoft® Dynamics™ Snap applications allow workers to access Microsoft® Dynamics™ data where and when they need it—while working in Microsoft® Office. It's one of the good features of Microsoft® Dynamics™ Ax.
Now Snap for Microsoft® Dynamics™ AX 2009 is available. To download the source code logon to click http://www.codeplex.com/axsnap.
The Business Data Lookup Snap-in enables an Information Worker to look for information in Microsoft Dynamics AX™ 2009 from within 2007 Microsoft® Office system applications. Using a task pane launched within Word, within Microsoft Excel® or within an email in Microsoft Outlook®, the Information Worker can
· Search for records like customers, contacts, sales orders, inventory items etc.
· View details of these records
· Browse data related to a particular record, e.g. all sales orders for a particular customer
· Select and copy data into the document
· Attach the document to a selected record in Microsoft Dynamics AX for reference
· View details of these records
· Browse data related to a particular record, e.g. all sales orders for a particular customer
· Select and copy data into the document
· Attach the document to a selected record in Microsoft Dynamics AX for reference
Some of available Microsoft Dynamics Snap applications are:
Business Data Search Provides powerful search capabilities that allow an information worker/user to search for information across Microsoft business systems including Microsoft Dynamics AX and SharePoint Server portals from within Microsoft Office Outlook as simply as searching email.
Business Data Lookup
Custom Report Generator
Timesheet Management
Vacation Management
Expense Management
Customer Journal
For more information you can see the Microsoft website http://www.microsoft.com/dynamics/product/snap.mspx
Tuesday, September 30, 2008
Microsoft® DynamicsTM Ax container manipulation using X++
Note: There is no warranty in the code written below. Use at your own risk.
Overview
Container is a built-in data type, X++ supports a number of functions to manipulate the contents of containers. This topic describes the built-in functions for manipulating containers. In other way we can say X++ has a general data type called a container that can be regarded as a dynamic untyped array of primitive data types, containers, and arrays. Containers can be used to hold a list of items of different types.
Allocation of containers
Containers are automatically allocated, when a container variable is used which means that you do not have to create a container using new.
Disposal of containers
To explicitly dispose the contents of a container use the connull function.
void DisposalMethod()
{
container con;
con = connull( );
}
Length
When you operate on a container, you often need to know how many items it contains. The conlen function returns the number of items in the container.
void LengthMethod()
{
container con;
//gives output 0 as there are initially no elements in a container
print conlen(con);
}
Finding a sequence of elements
To locate a sequence of items in a container, use the confind function. confind takes a container and one or more items as arguments. The function returns 0 (the item was not found) or the item’s sequence number.
void SequenceMethod()
{
container con = [100,110, ”Hello World”];
int i;
i = confind( con, “Hello World”); //i has the value of Hello World
}
Insertion
Sometimes you need to insert some items in a container. Use the conins function, which takes a variable number of arguments: the container, position, and the items to be inserted.
void InsertionMethod()
{
container con;
con = conins(con,10,”Hello Testing”);
}
Deletion
To delete one or more items from a container, use the condel function. condel takes three arguments: the container, the start position for deletion, and the number of items to be deleted.
void DeletionMethod()
{
container con = ["Hello", 100, 5.55);
con = condel(con,1,2);
}
Replacement
To replace an item in a container, use the conpoke function. conpoke takes a variable number of arguments: the container, the position (to be poked), and the new item.
void ReplacementMethod()
{
container con = [10, 30.11, ”Hello”];
// Replaces the first item - 10 - with “Hello World”
con = conpoke(con, 1, ”Hello World”);
}
Extraction
A container allows you to hold a number of items, possibly of different types, and then use them in some other context. To use the items, you need to be able to extract them from the container. This is the purpose of the conpeek function. conpeek takes two arguments: the container and the position to be peeked.
The conpeek function automatically converts the peeked item into the expected return type. Strings can automatically be converted into integers and vice versa.
void ExtractionMethod()
{
str 10 string;
container con = [10, 30.11, ”Good Testing”];
// Extracts the real 30.11 and converts it into a string: “30.11”
string = conpeek(con,2);
}
You can extract more than one element from a container with a composite assignment:
void ExtractionMethod1()
{
str 10 string;
int i;
real rl;
container con = [10,30.11,”Hello”];
[il,r, string] = con; // Extracts 10 into i, 30.11 into rl and “Hello” into string
}
Monday, September 29, 2008
Microsoft® DynamicsTM AX 2009 Known Issues
This Known Issues document contains information about known issues in the May 2008 release of Microsoft® DynamicsTM AX 2009.
To see the issues click on the link below (Extranet login is required).
Microsoft Dynamics AX 2009 Known Issues
Here you can see the issues and solutions.
The above link can be changed without any notice.
To see the issues click on the link below (Extranet login is required).
Microsoft Dynamics AX 2009 Known Issues
Here you can see the issues and solutions.
The above link can be changed without any notice.
Saturday, September 20, 2008
How to use CLR Interop with Dynamics Ax 4.0
This article will explain you how to use CLR Interop with Dynamics Ax 4.0.
Write your business logic in .Net environment and use that within Dynamics Ax.
It assume that you are familiar with Microsoft Dynamics Ax and Visual Studio .Net
You should have Ax 4.0 & Visual Studio .Net installed on your system.
There is No warranty on this article, use at your own risk. If it’s useful then refer to others.
.NET CLR Interop Overview
Classes in assemblies that are managed by the common language runtime (CLR) can be accessed in X++ code. This feature of Microsoft Dynamics AX is called common language runtime (CLR) interoperability, or CLR interop.
The CLR interop feature works only in the direction from X++ calling into CLR managed assemblies. It does not support calling X++ classes from a CLR managed assembly.
CLR interop is useful when you want your X++ code to access the functionalities in a CLR managed assembly.
1.
Open Visual Studio and create a new project. During creating a new project area, choose programming language Visual C# and template Class library. I have given the project name TalkToDotNet.

Figure 1.

Figure 2.
2.
By default you will get a standard class template as below:
using System;
using System.Collections.Generic;
using System.Text;
namespace TalkToDotNet
{
public class Class1
{
}
}
3.
Now add the following lines within Class1
public string CombinedMsg(string _msg)
{
string message1;
message1 = _msg;
return message1 + "From .Net: I am fine";
}
After addition the above lines the class1 will look like:
using System;
using System.Collections.Generic;
using System.Text;
namespace TalkToDotNet
{
public class Class1
{
public string CombinedMsg(string _msg)
{
string message1;
message1 = _msg;
return message1 + "From .Net: I am fine";
}
}
}
The above class is having a method called CombinedMsg which takes a string parameter and add "From .Net: I am fine" string with the parameter string.
4.
Now go to the project explorer window and select the project. Right click on the project and click on Properties. You will get the window as below.

Figure 3.
5.
Click on Signing Tab and then check the check box Sign the assembly.

Figure 4.
6. Choose New from the drop down box as shown below.

Figure 5.
7.
It will ask you for user id and password to protect your business logic. This is optional. You may ignore.

Figure 6.
8.
Click on Build menu then Build Solution.

Figure 7.
If any error is there then you will be prompted otherwise you will get the successful message. Now copy the dll from your project area and paste it to Bin directory of your Ax client folder.
9.
Now open your Ax application.
10.
Open AOT, select the References node and right click on it. On the context menu click on Add reference.

Figure 8.
11.
You will get the window as below. Click on Browse button and go to the Bin folder of your Ax client folder.

Figure 9.

Figure 10.

Figure 11.
12.
See the dll is added.

Figure 12.
13.
The dll is now added in the references node of AOT.

Figure 13.
14.
Now create a job in Ax and call the dll.

Figure 14.

Figure 15.
15.
The job is as below.

Figure 16.

Figure 17.
Write your business logic in .Net environment and use that within Dynamics Ax.
It assume that you are familiar with Microsoft Dynamics Ax and Visual Studio .Net
You should have Ax 4.0 & Visual Studio .Net installed on your system.
There is No warranty on this article, use at your own risk. If it’s useful then refer to others.
.NET CLR Interop Overview
Classes in assemblies that are managed by the common language runtime (CLR) can be accessed in X++ code. This feature of Microsoft Dynamics AX is called common language runtime (CLR) interoperability, or CLR interop.
The CLR interop feature works only in the direction from X++ calling into CLR managed assemblies. It does not support calling X++ classes from a CLR managed assembly.
CLR interop is useful when you want your X++ code to access the functionalities in a CLR managed assembly.
1.
Open Visual Studio and create a new project. During creating a new project area, choose programming language Visual C# and template Class library. I have given the project name TalkToDotNet.

Figure 1.

Figure 2.
2.
By default you will get a standard class template as below:
using System;
using System.Collections.Generic;
using System.Text;
namespace TalkToDotNet
{
public class Class1
{
}
}
3.
Now add the following lines within Class1
public string CombinedMsg(string _msg)
{
string message1;
message1 = _msg;
return message1 + "From .Net: I am fine";
}
After addition the above lines the class1 will look like:
using System;
using System.Collections.Generic;
using System.Text;
namespace TalkToDotNet
{
public class Class1
{
public string CombinedMsg(string _msg)
{
string message1;
message1 = _msg;
return message1 + "From .Net: I am fine";
}
}
}
The above class is having a method called CombinedMsg which takes a string parameter and add "From .Net: I am fine" string with the parameter string.
4.
Now go to the project explorer window and select the project. Right click on the project and click on Properties. You will get the window as below.

Figure 3.
5.
Click on Signing Tab and then check the check box Sign the assembly.

Figure 4.
6. Choose New from the drop down box as shown below.

Figure 5.
7.
It will ask you for user id and password to protect your business logic. This is optional. You may ignore.

Figure 6.
8.
Click on Build menu then Build Solution.

Figure 7.
If any error is there then you will be prompted otherwise you will get the successful message. Now copy the dll from your project area and paste it to Bin directory of your Ax client folder.
9.
Now open your Ax application.
10.
Open AOT, select the References node and right click on it. On the context menu click on Add reference.

Figure 8.
11.
You will get the window as below. Click on Browse button and go to the Bin folder of your Ax client folder.

Figure 9.

Figure 10.

Figure 11.
12.
See the dll is added.

Figure 12.
13.
The dll is now added in the references node of AOT.

Figure 13.
14.
Now create a job in Ax and call the dll.

Figure 14.

Figure 15.
15.
The job is as below.

Figure 16.
static void TalkToDotNet(Args _args)
{
str strval;
TalkToDotNet.Class1 testCls = new TalkToDotNet.Class1();
strval = testCls.CombinedMsg('From Ax: How are you? ');
print strval;
pause;
}
{
str strval;
TalkToDotNet.Class1 testCls = new TalkToDotNet.Class1();
strval = testCls.CombinedMsg('From Ax: How are you? ');
print strval;
pause;
}
16.
See the print message below. It takes a string message from Ax and adds it with the message returned by dll.

Figure 17.
Hope it would a helpful article for you guys.
Thursday, June 5, 2008
How to open Dynamics Ax form through X++ code
This article shows how to open forms in Dynamics Ax through X++ code.
Note: Use at your own risk.
You should be familiar with X++ basic programming.
I applied it on Dynamics Ax 3.0
1) Open your Ax application then AOT.
2) Go to Jobs node and create a new job.
3) Add the following codes in your job to open a form by menuitem name.
MenuFunction menuFunction;
;
menuFunction = new MenuFunction(MenuItemDisplayStr(CustTable), MenuItemType::Display);
menuFunction.run();
Your job will look like:
static void Job1(Args _args)
{
MenuFunction menuFunction;
;
menuFunction = new MenuFunction(MenuItemDisplayStr(CustTable), MenuItemType::Display);
menuFunction.run();
}
You can open your form by form name also.
1) Create a new job.
2) Copy the below code and paste to your job.
static void Job2(Args _args)
{
Args args;
FormRun formRun;
;
args = new Args();
args.name(formstr(CustTable));
formRun = new FormRun(args);
formRun.run();
formRun.wait();
}
Saturday, May 24, 2008
Provide Base Enum name and element number and get the label of that element through X++
In this article you will be aware that how the get the label of an element of a base enum.
Prerequisite: You should have basic programming knowledge of X++.
I applied it on Ax 3.0
You can provide the base enum name directly using global method fieldnum() or you can provide it in a string using method fieldname2id() where you need to give table id and fieldname.
Steps are as below:
1) Open your Ax application then AOT.
2) Go to Jobs node and create a new job. Rename the job if you need. I renamed it to DictEnumElementLabel.
3) Now write the following lines...
static void DictEnumElementLabel(Args _args)
{
DictEnum de;
DictField df;
;
df = new DictField(tablenum(SalesTable),fieldname2id(tablenum(SalesTable),'SalesType'));
if(typeof(df.type()) == Types::Enum) //checks if Type == Enum
{
de = new DictEnum(df.enumId());
info(de.index2Name(3)); // print element label
}
else
info('Not Enum type');
}
4) Now run the job and you will get the label of element of the base enum 'SalesTypes' you specified.
Provide Base Enum name and get the number of elements through X++
In this article I will tell you how the get number of elements of a Base Enum...
Prerequisite: You should have basic programming knowledge of X++.
I applied it on Ax 3.0
You can provide the base enum name directly using global method fieldnum() or you can provide it in a string using method fieldname2id() where you need to give table id and fieldname.
1) Open your Ax application then AOT.
2) Go to Jobs node and create a new job. Rename the job if you need. I renamed it to DictEnumElements.
3) Now write the following lines...
static void DictEnumElements(Args _args)
{
DictEnum de;
DictField df;
;
df = new DictField(tablenum(SalesTable),fieldname2id(tablenum (SalesTable),'SalesType'));
if(typeof(df.type()) == Types::Enum) //checks if Type == Enum
{
de = new DictEnum(df.enumId());
info(int2str(de.values()));
}
else
info('Not Enum type');
}
4) Now run the job and you will get the number of elements of the base enum 'SalesTypes'
Thursday, May 15, 2008
How to browse tables in Dynamics Ax by using X++
This article explains:
How to browse a table runtime in Microsoft Dynamics Ax
How to rbowse a table using x++ language in Microsoft Dynamics Ax
How to browse a table programatically in Microsoft Dynamics Ax
How to open a Microsoft Dynamics Ax table by using X++ codes
Note: You should be familiar with Dynamics Ax basic programming.
{
SysTableBrowser systabB;
;
systabB = new SysTableBrowser();
systabB.run(tablenum(inventtable));
}
How to browse a table runtime in Microsoft Dynamics Ax
How to rbowse a table using x++ language in Microsoft Dynamics Ax
How to browse a table programatically in Microsoft Dynamics Ax
How to open a Microsoft Dynamics Ax table by using X++ codes
Note: You should be familiar with Dynamics Ax basic programming.
Open your Ax application then AOT.
Go to Jobs node and crate a new job.
Copy and paste the code below. Here I renamed the job to BrowseTable.
I applied it on Ax 3.0
static void BrowseTable(Args _args){
SysTableBrowser systabB;
;
systabB = new SysTableBrowser();
systabB.run(tablenum(inventtable));
}
Sunday, April 27, 2008
New Features in Microsoft Dynamics Ax 2009
There is a good news…
In Dynamics Ax 4.0 enterprise portal every site is company specific. You can’t change company. But now in Dynamics Ax 2009 Enterprise Portal you can change company. If you have the access to see data of cross company, you can change company and see data. It is really a good feature.
Another thing is, you can write select statement in X++ using crossCompany key word.
Wednesday, April 16, 2008
How to write a web lookup method in X++ (Dynamics Ax)
This article is for those who has basic knowledge of Dynamics Ax (Axapta).
To write this method I used Ax 3.0
Prerequisite: You should have Ax 3.0 Enterprise Portal (EP) installed and license for EP development.
1. Open your Ax application then AOT.
2. Create a new table and rename it as you wish (I used a name "WebLookUpTable") and add three fields to it as shown below:

3. Now go to Methods node of the table you just created and add a new method.
4. Rename the method "webLookUpTableTest" or as you wish. Your method now is a void type. Add "client static" before void key work.
5. Now add the following lines to your method.
client static void webLookUpTableTest()
{
webTableLookup webTableLookup;
Query query;
QueryBuildDataSource queryBuildDataSource;
;
webTableLookup = webTableLookup::newParameters(tableNum(WebLookUpTable));
webTableLookup.addLookupfield(fieldNum(WebLookUpTable, ProfileId),true);
webTableLookup.addLookupfield(fieldNum(WebLookUpTable, Name));
webTableLookup.addLookupfield(fieldNum(WebLookUpTable, Phone));
query = new Query();
queryBuildDataSource = query.addDataSource(tableNum(WebLookUpTable));
webTableLookup.parmQuery(query);
webTableLookup.run();
}
5. Browse your newly created table and create some data in the table.
6. Now your table and web lookup method is ready. You can use it on your existing web form or create a new web form to test it. I used a new web form.
7. To create a new web form go to Web node of AOT then Web Forms. Right click on Web Forms node, on context menu click on New Web Form. Give a name to this form if you wish. Add a WebEdit control to the web form. Go to the Methods node of the WebEdit control and select then right click on it and select Override Methods then "lookup" method.
8. Double click on the lookup method and add "WebLookUpTable::webLookUpTableTest();" after super().
Your web form will look like:
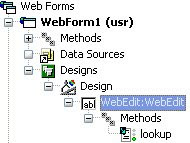
9. Right click on the WebEdit control and click on Properties. Set "Custom" for LookupMethod property.
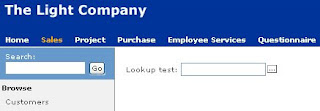
10. Create a menu item for this web form and add it to a web menus wherever you want. I added it to EPSalesHome->Common tasks->Lookup test.

11. Save your entire customization and run your EP. Browse the web form you added and see the control on that form. A lookup button will be available on this control.
To write this method I used Ax 3.0
Prerequisite: You should have Ax 3.0 Enterprise Portal (EP) installed and license for EP development.
1. Open your Ax application then AOT.
2. Create a new table and rename it as you wish (I used a name "WebLookUpTable") and add three fields to it as shown below:

3. Now go to Methods node of the table you just created and add a new method.
4. Rename the method "webLookUpTableTest" or as you wish. Your method now is a void type. Add "client static" before void key work.
5. Now add the following lines to your method.
client static void webLookUpTableTest()
{
webTableLookup webTableLookup;
Query query;
QueryBuildDataSource queryBuildDataSource;
;
webTableLookup = webTableLookup::newParameters(tableNum(WebLookUpTable));
webTableLookup.addLookupfield(fieldNum(WebLookUpTable, ProfileId),true);
webTableLookup.addLookupfield(fieldNum(WebLookUpTable, Name));
webTableLookup.addLookupfield(fieldNum(WebLookUpTable, Phone));
query = new Query();
queryBuildDataSource = query.addDataSource(tableNum(WebLookUpTable));
webTableLookup.parmQuery(query);
webTableLookup.run();
}
5. Browse your newly created table and create some data in the table.
6. Now your table and web lookup method is ready. You can use it on your existing web form or create a new web form to test it. I used a new web form.
7. To create a new web form go to Web node of AOT then Web Forms. Right click on Web Forms node, on context menu click on New Web Form. Give a name to this form if you wish. Add a WebEdit control to the web form. Go to the Methods node of the WebEdit control and select then right click on it and select Override Methods then "lookup" method.
8. Double click on the lookup method and add "WebLookUpTable::webLookUpTableTest();" after super().
Your web form will look like:

9. Right click on the WebEdit control and click on Properties. Set "Custom" for LookupMethod property.
10. Create a menu item for this web form and add it to a web menus wherever you want. I added it to EPSalesHome->Common tasks->Lookup test.

11. Save your entire customization and run your EP. Browse the web form you added and see the control on that form. A lookup button will be available on this control.

[control on web form]

[Lookup form]
In the above lookup method, you are using "webTableLookup" class to crate lookup. The Query and QueryBuildDataSource have been used to set data data source to web lookup form.
webTableLookup.addLookupfield(fieldNum(WebLookUpTable, ProfileId),true);
In the above line true has been passed because of return value. It means the selected ProfileId to be returned to the WebEdit control.
Monday, April 14, 2008
What’s New in Microsoft Dynamics AX 2009
Hi Guys,
There are some interesting things related to Microsoft Dynamics AX 2009 available at Microsoft's official website. To see click here What’s New in Microsoft Dynamics AX 2009 (Requires partnersource access).
Microsoft Dynamics AX 2009 is coming with many new features. Now you can use your .Net skills widely with Dynamics AX 2009.
Monday, April 7, 2008
How to use .Net Business Connector for Dynamics Ax 4.0 within .Net
NOTE: No warranties, use at your own risk.
Requirement :
1) Ax 4.0 with .Net Business Connector
2) Visual Studio 2005 (preferred)
Business Connector enables third-party applications to interface with Microsoft Dynamics AX as though they were a native Microsoft Dynamics AX client. Applications built using the Microsoft .NET Framework or ASP.NET can now interface with Microsoft Dynamics AX using the .NET Business Connector. The .NET Business Connector is integrated with Enterprise Portal and Web services. You can leverage the benefits of these other applications and services by installing the .NET Business Connector.
Open your visual studio.
Click on File>New>Project. New Project window will open. Select Visual C# from Project types and Windows Application from Templates. Give a name in the Name field and click on OK button.

By default Form1 will be added to your project.
From Toolbox add a button and a textbox to the form as shown below:

Double click on the button.
Now see the default code below:
using System;
using System.Collections.Generic;
using System.ComponentModel;
using System.Data;
using System.Drawing;
using System.Text;
using System.Windows.Forms;
namespace DotNet2Ax //your project name
{
public partial class Form1 : Form
{
public Form1()
{
InitializeComponent();
}
private void button1_Click(object sender, EventArgs e)
{
}
}
}
Click on menu Project >Add Reference…
It will give you the dialog as below:

Click on Browse tab and browse the Ax 4.0 Client folder then Bin and locate Microsoft.Dynamics.BusinessConnectorNet.dll as shown below:

Click OK button.
Now add the below lines in the button1_Click method.
Microsoft.Dynamics.BusinessConnectorNet.Axapta DAX = new Microsoft.Dynamics.BusinessConnectorNet.Axapta();
Microsoft.Dynamics.BusinessConnectorNet.AxaptaRecord DAXRec;
DAX.Logon(null, null, null, null);
DAXRec = DAX.CreateAxaptaRecord("CustTable");
DAXRec.ExecuteStmt("select firstonly * from %1");
textBox1.Text = (string) DAXRec.get_Field("name");
After adding the lines it will look like:
private void button1_Click(object sender, EventArgs e)
{
Microsoft.Dynamics.BusinessConnectorNet.Axapta DAX = new Microsoft.Dynamics.BusinessConnectorNet.Axapta();
Microsoft.Dynamics.BusinessConnectorNet.AxaptaRecord DAXRec;
DAX.Logon(null, null, null, null);
DAXRec = DAX.CreateAxaptaRecord("CustTable");
DAXRec.ExecuteStmt("select firstonly * from %1");
textBox1.Text = (string)DAXRec.get_Field("name");
}
Now click on Build>Build Solution.
Click on Debug>Start Debugging. Your Form1 will run. Click on the button and see the value of CustTable field ‘Name’.

Code Description:
DAX.Logon(null, null, null, null);
The above method takes logon criteriaon/parameters
Company, Language, ObjectServer, Configuration all are in string
DAXRec = DAX.CreateAxaptaRecord("CustTable");
In the above line table name has been specified.
DAXRec.ExecuteStmt("select firstonly * from %1");
In the above line select statement has been specified.
textBox1.Text = (string)DAXRec.get_Field("name");
In the above line selected record of field name is being assigned to the textBox control.
Thursday, April 3, 2008
How to use ActiveX in Dynamics Ax
Hi Guys,
Finally I got time to post an article for you.
Today I will show you how to use ActiveX in Dynamics Ax (Axapta)...
When creating an Axapta form, you can benefit from using ActiveX controls. An ActiveX control is a COM object that can be used as a graphical control inside an application.
The software available as ActiveX components spans from simple components such as check and combo boxes, to larger more complex components such as spreadsheets, calendars, Internet browsers, and communication programs.
In this article the screen shots I used of Ax 3.0.
I will tell you step by step as below:
You should have Microsoft Outlook installed on your system.
No warranties, use at your own risk.
1) Open your AOT and point to Forms.
2) Right click on Forms node and select New Form from the context menu as shown below
3) Rename the form to OutlookAccess
4) Expand the Form nodes and to Designs>Design
5) Right click on Design>New Control>ActiveX as shown below

ActiveX Browser will open. Select Microsoft Office Outlook View Control as shown below

6) Create two Groups on form Design. Drag and drop the ActiveX control to the first group and in the second group add a ButtonGroup control as shown below.
7) Now add two buttons to the ButtonGroup. Add Override method "clicked" to each of the button.
8) In the first button's clicked method write "activex.Open();" before super(); as shown below;

9) Write "activex.AddressBook();" in the second button's clicked method before super();

Now your form design looks like this

10) Save the form and run the form.
Hope it will help you a lot.
Subscribe to:
Posts (Atom)